Project Wonderful

Friday, January 27, 2017

Beer Can Chicken

I recently picked up a Kamado style grill (Char Griller Akorn) and have been testing it out with a variety of recipes. Next up was Beer Can Chicken.

The exact history of this culinary technique is lost to the greasy fingers of time, but the most widely-accepted origin places it at college universities around the 70's and 80's. Some frat boy presumably shoved a beer can up a chicken's ass and stood it on the grill as a joke, then quickly discovered that this is a pretty good way to cook the bird. The vertical orientation allows the skin to brown evenly (three cheers for the Maillard Reaction!) while the fat renders away clean, leaving a crisp skin.

It's my belief that the beer doesn't really provide much flavor to the meat. Because you're adding a strong flavor on the skin with the rub, I doubt you'd be able to detect any beer-like notes in the meat. Some say the beer adds additional moisture to the bird, but I don't know about that. Even with an oven temp of 350, the beer never heats up to the point that it will steam. As the guys from AmazingRibs.com have said, you are essentially wrapping your beer in a chicken coozie.

Honestly, the beer can is just there to provide stability: the third leg of the tripod created by the chicken's legs. That's it.

So spend your time building flavor with the rub and the smoke and you'll have an amazingly flavorful chicken afterward.

Here's the rub I used:

  • 1/4 cup Brown Sugar
  • 1/4 cup Paprika
  • 3 tbs Kosher Salt
  • 1tbs Black Pepper
  • 1 tbs Garlic Powder
  • 1 tbs Onion Powder
  • 1 tbs Chili Powder
  • 1 tsp Cumin

Rub some olive oil on the bird and sprinkle the rub liberally over the chicken. Rub it in to all the nooks and crannies. Be sure to get some rub on the inside cavities as well.

I stuck a chunk of onion into the neck cavity at the top, It didnt do anything for the chicken, but it sure tasted good. That's the chef's treat.

Get your smoker or grill set up for indirect cooking. (coals on one side, meat on the other). Place a chunk or two of your choice of smoking wood on the coals. (I used mesquite, but any aromatic wood will do)

Keep your smoker at 325 deg or less. After about 2 hours, you should have an internal temperature in the breast of 165.

Take off the smoker, wrap loosely with foil and let it rest for at least 15 minutes. (30 is better)

Cut, serve, bask in the glory of happy diners.


Saturday, August 9, 2014

Oven Baked BBQ Ribs with Heirloom Tomato BBQ Sauce

Angela came home with a rack of baby back ribs. But with the Summer heat, I didn't feel like stoking the smoker and tending to it for 4 hours, so I decided to do the ribs in the oven instead.

To be honest, I'd never done ribs in an oven before. I always do them on a smoker. But the principals are essentially the same: low heat over a long period of time breaks down and renders out the fat so that the meat is tender, juicy and delicious. And with the right rub, the flavors are amazing.

Because these were going in the oven, I came up with a rub recipe that's great for use with meat that's not being smoked. By adding smoked paprika and hickory smoked sea salt, you still get the smoky flavors, but don't have to worry about tending to the smoker every hour.

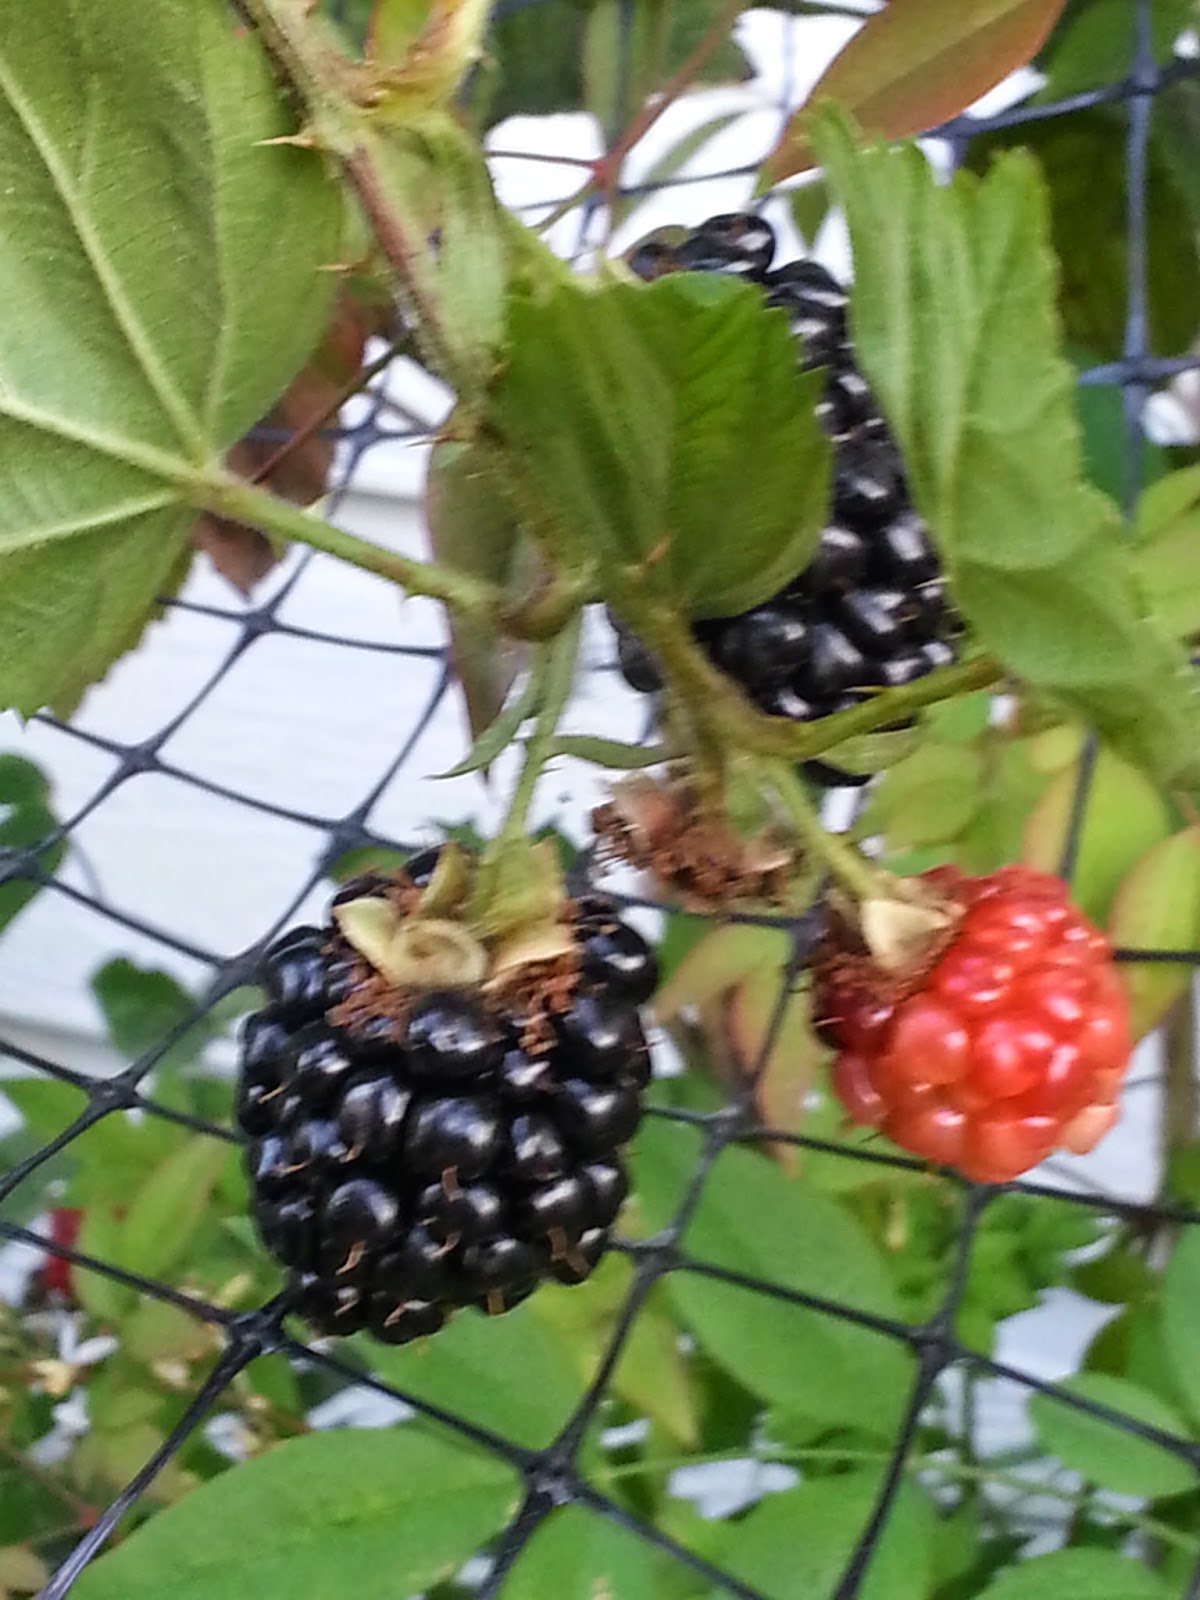
In addition to the ribs, our front yard tomato garden has given us quite a few beautiful tomatoes this Summer. We were gifted a ton of heirloom tomato seeds, so we planted several varieties. Growing tomatoes in Texas is always a challenge, but I've found that brute-force gardening seems to work. Starting with quality soil rich in nutrients (mostly compost) and watering every other day has been the best way to beat the Texas heat. As a result, we've got a thriving garden bed that is producing lots of tomatoes right now. And with more on the way, the kitchen counter was quickly filling up, so I decided to turn the whole first batch into BBQ sauce for the ribs.

Technically if you have a rub, you don't also need a sauce as the two things compete for flavors and muddle everything up a bit. But since the tomato garden was exploding, I made a sauce too. It's a little on the vinegar side, so if you don't like vinegar based sauces, feel free to come up with a different recipe. Also, depending on which tomatoes you use, the flavor is going to be different. This particular batch was a mix of whatever was ready for harvest, so there are San Marzano's a few Black Icicles, some Juanne Flamme's, and one or two tomatoes that I cant quite identify.

Here's the recipes:

Rob's Rib Rub:

1Tbs Smoked Paprika
1Tbs granulated garlic
1Tbs Cumin
1Tbs onion powder
1Tbs brown sugar
2Tbs Hickory Smoked Sea Salt
1tsp dry mustard
1tsp white pepper
1tsp ground coriander

Pre-heat the oven to 225 degrees.

Lay the ribs meat side up in a baking dish and liberally sprinkle the rub over every inch. Rub it in with your hand. That's the best tool for the job .I've found its good to have one clean hand to hold the container of rub and one dirty hand to rub the rub into the meat. Don't forget the sides of the ribs!

Flip the ribs over (meat side down,) sprinkle the rub on the bone side and rub it in.

Wrap the baking dish with a sheet of aluminum foil and place it in the oven in the middle rack. Let this cook slowly for 3 1/2 to 4 hours.

Once the ribs are in the oven, start working on the BBQ sauce below.

After the ribs have cooked for the scheduled time, drain off the drippings and flip the ribs over so they are meat side up. Spoon some of the BBQ sauce onto the ribs and return them to the oven for another 20 minutes.


BBQ sauce:

3 lbs of garden tomatoes.  - peeled, crushed and de-stemmed
1 tbs olive oil
1 red bell pepper, chopped
1 large sweet onion chopped
3 cloves of garlic minced
1 tsp ground black pepper
1/8 tsp chipotle powder
1 cup brown sugar
1 Tbs paprika
2 tsp dry mustard
1 1/2 cups of apple cider vinegar
1/2 cup quality bourbon

First thing to do is to blanch the tomatoes. Score the bottom of the tomato with a knife and dunk them in a pot of boiling water for about 30 seconds. Then remove and submerge them in a bowl filled with ice cubes and water. This rapid heating/ cooling will cause the skins to wrinkle and they should come right off with very little difficulty.

Place the peeled tomatoes in a colander in the sink and start crushing them apart. You don't need any fancy tools for this, just crush them with your hands (It's a very rewarding process!) Remove any bad spots, along with the center stem of the tomato. Seeds are going to go everywhere. That's why you do this in a sink.

You could also place the colander over a large bowl to catch the seeds and juice if you want to save the seeds for next year.

Once all the tomatoes are crushed, let them sit in the sink to drain off any excess liquid.

While the tomatoes are draining, toss the onions into a pot with the olive oil. Cook them under medium heat till they're translucent.

Add the chopped bell pepper and cook till softened.

Add the garlic and cook till the kitchen starts to fill with the smell of cooking garlic. Don't overcook them or they'll turn bitter.

Add the black pepper, chipotle powder, brown sugar, paprika, mustard and apple cider vinegar. Let this mixture simmer for about 30 minutes, stirring frequently.

After 30 minutes, transfer the stewed mess to a blender - remember to remove the top fill cap of the blender and replace it with a loose paper towel. Hot ingredients when blended will expand rapidly. If the cap is on the lid, the whole thing could explode out of the blender. Blend the tomato mixture until its a fine puree and transfer this back to the pot. You may need to blend everything in batches.

Once the puree is back in the pot, add the 1/2 cup of bourbon. DONT USE THE CHEAP STUFF. You are going for flavor here, so use a whiskey that you like.

Set the pot on low heat and let this cook down for about 1 hour. You want everything to reduce to about half of its original quantity. This will thicken up the sauce nicely. If it starts getting too thick, add some more vinegar or water. If you think it's lacking anything, have a shot of whiskey until the thought subsides.

Serve the sauce in a bowl on the side.

And there you have it: oven-baked BBQ ribs with Heirloom BBQ sauce.

Wednesday, July 30, 2014

Toasted Sesame Seed Lemon Basil Pesto

I love pesto. That amazing emulsion of purred basil, pine nuts and Parmesan cheese is delicious on so many different kinds of foods. It originates in the Liguria region of Genoa Italy - the word Pesto comes from the Italian "pesta" which means to pound or crush. The original method of making pesto was to use a mortar and pestle. Thankfully the modern invention of the food processor makes this a simple process.

And if you don't have basil, you can make a pesto sauce with just about any greens you have. See my recipe for roasted carrot grilled cheese with carrot top pesto that I made up last year. Fantastic!

The ancient Romans ate a paste called moretum, which was made by crushing cheese, garlic and herbs together. Basil, the main ingredient of modern pesto, likely originated in India and was first domesticated there. Basil took the firmest root in the regions of Liguria, Italy and Provence, France. The Ligurians around Genoa took the dish and adapted it, using a combination of basil, crushed garlic, grated hard cheese (a mix of parmigiano-reggiano and pecorino or just one of the two), and pine nuts with a little olive oil to form pesto. - Wikipedia.

So before the dog days of Summer start wreaking havoc on your plants, now is the perfect time to start reaping the fruits of your gardening labor. Here is my standard go-to recipe:


Ingredients:
1-2  large handfuls of basil leaves, washed and dried.
1/2 cup sesame seeds, shelled and toasted.
3 cloves of garlic, peeled
2 pinches of coarse sea salt
4-6 TBS extra virgin olive oil
1 1/2 cup shaved Parmesan cheese


We grow a couple varieties of basil on the back porch. 
The afternoon sun is a little harsh, but we shade the plants and water them daily and they survive just fine.

That tall one in the middle is lemon basil and has an amazing lemony taste. It works great in my recipe. 

I cut a few of the branches off and plucked only the best leaves.
Anything that had spots or was a little yellow was discarded.
You could probably use them if you wanted, but I wanted to make this the absolute best tasting pesto I could, so I got picky. Plus there's still a lot of basil growing so I don't have to worry about running out. 


Plucked, washed and spin dried, the leaves are ready for the food processor.
This is about one good sized handful of leaves and makes about two cups of finished sauce.
Dont forget to use the flowers! Normally we pluck the flowers from the plant to help promote leaf growth, but occasionally a few buds remain. These have a great taste to them and work well in the sauce.

I didnt have any pine nuts and didnt feel like taking out a second mortgage to buy some
(seriously, those little buggers are crazy expensive!) so I used sunflower seeds instead.
You could also use blanched almonds, cashews or even peanuts if you wanted.
Each will give a slightly different taste, but any oily nut will work.
This is maybe half a cup of seeds. You can use more or less, depending on the flavor you like.

Toast the seeds in a large pan, stirring frequently. You can toast them to whatever level of toastiness you like, but the longer they toast, the stronger the flavor - until they become bitter.
This was after about 5 minutes on medium low heat. 


Here's a trick: pull the seeds out of the pan just BEFORE you think they're ready and transfer them to a cool plate.
They will continue to cook slightly while they're cooling.
Make sure they are completely cool before adding them to the processor.

Now the fun begins! Add the leaves, the nuts, about two pinches of coarse salt and a couple tablespoons of good quality olive oil to the processor and pulse everything till it starts combining.
Once it's combined, turn the processor on 
and drizzle in the olive oil as it's running.
You will probably need to scrape down the sides of the food processor once or twice during this process.

During the first scrape down, I add 3 cloves of peeled garlic and about a cup and a half of shaved Parmesan cheese and run the processor one more time until everything is blended together.
The longer you run the processor, the finer the texture it will become.
Personally I like mine a little chunky, but you can make this as smooth as baby food if you want.

The great thing about this sauce is that you really cant screw it up too bad. More olive oil will make it thinner, less will make it thicker. Either way, it's still awesome.

You could also add a squirt or two of lemon juice to help make the flavor even more bold. 

And there you have it: toasted sesame seed lemon basil pesto.
Essentially a pile of yummy green goo that can be used on grilled chicken,
topped on potatoes, corn on the cob, mixed in with pasta and shrimp,
or just smeared onto chunks of hearty bread and eaten with a good bottle of wine. 


ENJOY!


Saturday, May 31, 2014

Blackberry Cobbler III

A couple years ago, I was gifted four blackberry saplings (primocanes) from a friend of mine. I figured they would be good as a natural home break-in deterrent, so I planted them in the front of the house, under a window to our laundry room.

This Spring, they really started to take off.

For me, the first thing I think of when I see blackberries is cobbler. I just love the combination of tart/ sweet and cakey dough.  The mind explodes with flavors and textures that instantly turn you into a kid. Served still warm from the oven with a little Vanilla ice cream and you'll quickly forget what you just had for dinner.

Blackberries are very good for you. 1 cup of blackberries has 7 grams of fiber and almost half the daily requirement of vitamin C. It ranks #1 in in-vitro anti-oxidants and its' compounds have been determined in scientific studies to help reduce certain types of cancer cells.

But let's be honest here:

We're making a cobbler. 
With a cup and a half of sugar and a stick and a half of butter. 
Don't eat this because you think it's healthy, 
eat this because it's AMAZINGLY delicious.


After the plant blossoms, the fruit starts growing.
Green at first, changing to a raspberry color, then shifting to dark purple.
The phytochemical Anthocyanin is what gives the fruit its dark purple color and also contributes a slightly tart taste.


Soon, little one.
Soon you will join your siblings in a glorious union of sugar and butter.  

The fruit is ready to pick when it's uniform in color and a little soft to the touch.
It should come off the plant with a gentle tug.

Little lumpy bombs of berry bodaciousness. 

There was more in this bowl before I thought to grab my camera. 
I combined the fresh picked berries with a couple of cups I had in the freezer, soaked them in cool water to defrost and started making the cobbler.

This is my third recipe for blackberry cobbler. The first recipe was a reverse-style, where the dough starts on the bottom, the second recipe was done in a cast iron pan and now this one: more of a traditional style, with a couple of twists thrown in.

Ingredients:

For the filling:
3 cups of blackberries - rinsed and dried
1 tablespoon lemon juice
1/2 cup sugar
1/4 tsp cinnamon
3 Tbs corn starch
1 cup cold water
4 Tbs butter

For the dough:
1 cup flour
1 cup sugar
1 tsp baking powder
1/2 cup of butter - cold
1/2 cup cold water

Preheat oven to 350

To make the filling:
Place the blackberries, sugar, cinnamon and lemon juice in a large saute pan.

Add the cold water to the 3 tablespoons of corn starch and stir until it's dissolved.

Add this cornstarch slurry to the pan and bring everything to a boil.
Stir the mixture until it starts to thicken, about two minutes.
Pour the berry mixture carefully into a greased (brushed with butter) 8" x 11" baking dish.

Add the 1/2 stick of butter in little dollops around the dish.


For the dough:
In a large bowl, mix the flour, sugar, baking soda and salt together.

Using a pastry blender (or a couple of forks)
cut the cold butter into the flour sugar mixture until it looks like driveway gravel
(coarse sand would be too small. you want slightly larger chunks)
Add the cold water to the mixture and stir just until everything is combined. 

Spoon the dough onto the top of the filling in random clumps.

Then place the cobbler into the oven for 35-40 minutes, or until the dough turns a nice golden brown color.

When ready, set aside to cool for AT LEAST 30 minutes.
Remember, this stuff is like lava, and when it touches your skin it will burn a long time, so be careful!


The dough comes out very light and cakey (it pays to use fresh baking powder)
The berries are perfectly balanced. Not too sweet, not too tart. 

Grab a spoon and dig in!

Monday, March 17, 2014

Irish Soda Bread

St. Patrick's Day is upon us here at the pillow fort, and we follow a traditional Irish meal of corned beef, cabbage and soda bread.

The corned beef and cabbage were just tossed in the slow cooker with enough water to cover everything and some beer. Traditionally I would use Guinness, but having none at hand, I went with a bottle of Shiner Bock. After all, this is Texas and you have to inject some Texas flavor in everything you cook. I think it's in a rule book somewhere.

Soda bread is a type of "quick bread" that uses baking soda (sodium bicarbonate) instead of yeast to make the bread rise. This recipe uses buttermilk, and for a couple of reasons: 1, the baking soda reacts with the lactic acid of the buttermilk to make bubbles which helps to give the bread a light, tender consistency. And 2, it's awesome for flavor.

Fair warning: If you've never worked with buttermilk, you would swear it's just nasty, spoiled milk. It's thick, clumpy and not something you'd want to drink. But for baking, this, my friends, is the nectar of the gods. Buttermilk is one of those little secret ingredients in baking that will make whatever you bake with it stand out from the rest. Trust me: it's awesome.  

Don't have buttermilk? No worries! You can easily make it at home with milk and lemon juice. Just mix one cup of milk (whole or heavy cream work best) with 1 tablespoon of lemon juice and let it stand for 5-10 minutes. The lemon juice curdles the milk - which, as gross as this may sound - is what actually makes this recipe work great for baking. 

This soda bread recipe is probably one of the easier breads to make. It doesn't take much work and you don't need to let the dough rise, knock it down, then let it rise again like typical yeast breads. Total time from start to finish is about 2 hours. 

So roll up your sleeves and let's bake some bread!

Ingredients:
4 cups all-purpose flour
4 Tbs granulated sugar
1 tsp baking soda
1 Tbs baking powder
1/2 tsp salt
1/2 cup butter, softened
1 cup buttermilk
1 egg
1/2 cup dried currants (or raisins)
1/4 cup butter, melted
1/4 cup buttermilk


Preheat oven to 375º F. 

Cover a baking sheet with parchment paper. 

In a large bowl, mix together flour, sugar, baking soda, baking powder, salt and softened butter. 

Stir in 1 cup of buttermilk, the egg and the currants. It will be dry, slightly clumpy and a mess. Resist the urge to add more milk or liquid to the mix. This is the consistency you want. Seriously. 

Dump the dough onto a lightly floured surface and knead slightly, just enough to get all the ingredients to combine. Any more kneading will only make for tough, heavy bread. 

Form the dough into a round and place on the baking sheet. 

Use a sharp knife to cut an 'X' into the top of the loaf. Some people say this is supposed to be a cross for a reminder of Christ or something. BALDERDASH. Cutting an X into the dough helps it to expand and rise when baking. That's all. Plus it looks cool.

In a small bowl, combine 1/4 cup melted butter with 1/4 cup buttermilk and brush the loaf with this mixture. You will have a lot left over. This is OK. Just brush the loaf with the buttermilk mixture as it bakes.

Bake in preheated oven until a toothpick inserted into the center of the loaf comes out clean, about 45 to 50 minutes, but check for doneness after 30 minutes. 

Brush any of the leftover buttermilk/ butter mixture on the loaf as it cools. 


Enjoy!


Monday, March 3, 2014

Apple Goat Cheese King Cake

The other day I posted a recipe for a traditional king cake to share with office workers in the weeks before Mardi Gras. Most king cakes are a fairly simple, albeit a somewhat time-consuming endeavor: A sweet dough, rolled with cinnamon and pralines and doused in multi-colored sugary goo. Which is not to say that this isn't fantastic! But since tomorrow is Mardi Gras, I figured I should pull out all the stops and share a recipe for a king cake that truly tips the scales of decadent. If you really want to kick your Mardi Gras party up a notch, you have got to give this one a try.

On Chartres Street in New Orleans, just a few blocks away from Washington Square, there's a tiny little bakery called New Orleans Cake Cafe. Right about now, owner and head baker Steve Himelfarb and his crew are working overtime to meet demand for this, their signature cake. They make over 100 of these incredible confections per day as Mardi Gras draws near and the cakes go quick.

My recipe is a tip of the hat to Cake Cafe's wonderful creation, and if you are looking for a way to up your baking cred, this one will have people begging you to bring it to the Mardi Gras parties every year.

This recipe makes one seriously awesome king cake:

PASTRY:
1/2 cup milk
2 Tbs. butter
1 (.25 ounce) package active dry yeast (or 2 1/4 tsp)
1/3 cup warm water (110 degrees F/45 degrees C)
1/4 cup granulated sugar
1 egg
3/4 tsp. salt
1/2 tsp. apple pie spice
1/2 tsp. vanilla extract
2-3/4 cups all-purpose flour

FILLING:
1 (8-oz.) package cream cheese
1/2 cup granulated sugar
1 pinch salt (about 1/16th of a teaspoon)
1/2 tsp. vanilla extract
1/2 cup brown sugar
1 tsp. ground cinnamon
8 oz crumbled goat cheese
1 large or 2 small Granny Smith apples, cored and sliced

FROSTING:
1 cup powdered sugar
1 Tbs. spiced rum
Green, yellow and purple sugar sprinkles
Toy baby

To make the pastry:
Scald the milk as I described in my previous king cake recipe, remove from the heat and stir in 2 tablespoons of butter. Allow this mixture to cool to room temperature. 

Dissolve the yeast  in 110º  water with 2 teaspoons of the white sugar in a large bowl. Stir gently and let stand until the yeast starts to bubble and look creamy, about 5 - 10 minutes.

When yeast mixture is bubbling, add the cooled milk mixture. Whisk in the egg and stir in the remaining white sugar, salt and pie spice. Beat the flour into the mixture 1 cup at a time. The dough is going to look crumbly and dry, but work it with your hands to get everything incorporated. When the dough starts coming together, turn it out onto a lightly floured surface and knead it until it's smooth and elastic, about 8 to 10 minutes.

Spray a large bowl with a good cooking spray, place the dough in the bowl and turn to coat it. Cover with plastic wrap and let the dough rise in a warm place for two hours. A good suggestion would be to pre-heat the oven to "warm," then turn it off, put the dough in the oven, and turn on the oven light. This provides the perfect environment for the dough to rise.  

To make the filling:
Add the cream cheese, sugar, salt and vanilla extract to a medium sized bowl. With a hand mixer, (or if you are one of the cool people that have splurged and bought a stand mixer) beat the ingredients on high speed until everything is fully combined. Initially, it's going to clump and not do much of anything, but after a few seconds the cheese will start to soften and suddenly it will all come together. After about two minutes, set this aside.

In a separate bowl, stir together the brown sugar and cinnamon, and set aside.

When the dough is ready, preheat oven to 375º  and line a cookie sheet with parchment paper.

Roll the dough into a large rectangle about 8-10 inches wide and about 18 inches long.

Spread the cream cheese and sugar mixture evenly across the entire surface, then sprinkle the goat cheese crumbles over the cream cheese. You can use regular goat cheese if you want, but the crumbled stuff is so much easier to work with and covers the dough nicer. 

Lay the apple slices evenly down the center of the dough and sprinkle them with the cinnamon and sugar mixture.

Now the tricky part:
Fold the dough over the filling. To do this, take the front 1/3rd of the dough lengthwise and pull it to the center. Then take the back 1/3rd of the dough and pull it to the center too. Press the edges together to seal everything in. 

Gently roll the dough into a tube shape, being careful not to have the apples pierce the dough. Transfer the dough to the baking sheet and bring the ends around, pinching them together to form an oval shape. 

Here's a little trick:
When the dough is ready, place it on the oven rack in the pre-heated oven WITH THE DOOR OPEN for 3-5 minutes. This will give the dough a second rise, making it much more light and airy when it's finished. You don't have to do this, but its the little things like this that will really set the cake apart from the store-bought stuff.  

After 5 minutes, close the door and bake for about 35-40 minutes. You'll want to keep checking it to make sure that it doesn't over-cook. You're looking for a nice even golden color across the top of the cake.

When it's ready, pull it out and let it cool a bit, then carefully lift up the cake and insert the toy baby from underneath. 

To make the icing: 
Mix the cup of powdered sugar with the tablespoon of spiced rum until it's syrupy and pour-able. Drizzle this glaze over the top of the cake and, while its still wet, shake on the colored sprinkles.

We don't go for presentation too much here at the pillow fort, so I just served the cake as-is, on the parchment paper and used the baking sheet to support it. You will have curious fingers scooping up the pool of molten sugar and cheese that congeals at the base of the cake, but that will help tease people until the cake is ready to be served. 

BTW, you'll notice in the photo below that there's a plastic rooster in the center of the cake. I ran out of babies, so we decided to call this a "king cock."  Uh, you may not want to use that name.

This cake is amazing. The flavors combine together so nicely and while it is very sweet, the goat cheese adds a nice bit of tanginess that works great with the apples. It's a winner.

And if you're ever in Nola, go to Cake Cafe and give the folks there my regards.

Enjoy!


Cake Cafe Photo credit, Jeffery Johnston, MyNewOrleans.com

Thursday, February 27, 2014

Mardi Gras King Cake

Mardi Gras is almost here, so I decided to try my hand at making a traditional King Cake.

The "king cake" takes its name from the biblical three kings. In Catholic liturgical tradition, the Solemnity of Epiphany - commemorated on January 6 - celebrates the visit of the Magi to the Christ Child. The Eve of Epiphany (the night of January 5) is popularly known as Twelfth Night (the Twelve Days of Christmas are counted from Christmas Eve until this night). The season for king cake extends from the end of the Twelve Days of Christmas (Twelfth Night and Epiphany Day), up until Mardi Gras, or "Fat Tuesday;" the day before the start of Lent. Some organizations or groups of friends may have "king cake parties" every week through the Carnival season. In Portugal and France, whoever gets the King cake trinket is expected to buy the next cake for these get-togethers.   -Wikipedia 

I'm still new to baking, so I researched several variations and decided to do a more traditional one for my first attempt. This recipe comes courtesy of allrecipes.com and makes two king cakes, filled with a delicious blend of pecans, brown sugar and raisins.

Fair warning: this is a time-consuming process, as you have to let the dough rise for at least two hours, then punch it down, make the roll and let it rise again for about 45 minutes before you bake it for a half hour. So be sure to allocate enough time for this!

The recipe calls for scalding the milk before adding it to the dough. A lot of people have asked why this is necessary. The answer: science!

Scalding the milk first serves a couple of purposes:

  1. While all modern milk is pasteurized before being sold, the pasteurization process may not always eliminate all of the bacteria and wild yeasts that can reside in it, and these wild yeasts can alter the texture and flavor of the finished bread. 
  2. One of the enzymes in the whey protein of milk weakens the gluten in flour and prevents the bread from rising as high as it should. Scalding kills this enzyme.
  3. Scalded milk also helps to dissolve other ingredients added, like butter and speeds up the process of infusing flavor components like vanilla beans.

To scald the milk, use a heavy bottomed pan to prevent scorching and heat the milk over medium heat. Stir the milk frequently, as this will prevent a protein film from forming over the surface. Once bubbles start to form around the edge of the pan and the milk gives off steam, take it off the heat to cool. That's it.

So roll up your sleeves and let's get to work.


INGREDIENTS:

PASTRY:
1 cup milk
1/4 cup butter
2 (.25 ounce) packages active dry yeast
2/3 cup warm water (110º)
1/2 cup white sugar
2 eggs
1 1/2 teaspoons salt
1/2 teaspoon freshly grated nutmeg
5 1/2 cups all-purpose flour

FILLING:
1 cup packed brown sugar
1 tablespoon ground cinnamon
2/3 cup chopped pecans
1/2 cup all-purpose flour
1/2 cup raisins
1/2 cup melted butter

FROSTING:
1 cup confectioners' sugar
1-2 Tbs water


Scald the milk, remove from heat and stir in 1/4 cup of butter. Allow this mixture to cool to room temperature. 

While the milk is cooling, It's time to resuscitate the yeast. Dissolve two yeast packets in warm water (about 110 degrees, no hotter) with 1 tablespoon of the white sugar in a large bowl. Stir gently and let stand until the yeast starts to bubble and look creamy after about 10 minutes. (I personally feel like Doctor Frankenstein every time I wake up yeast. The house is always filled with me shouting "It's alive! It's ALIVE!!" 

When yeast is ready, add the cooled milk mixture. Whisk in the eggs and stir in the remaining white sugar, salt and nutmeg. 

Use a hand mixer and beat the flour into the milk/egg mixture 1 cup at a time. Eventually your mixer will become inefficient so switch to a heavy duty spoon and hand mix the rest of the way. When the dough has pulled together, turn it out onto a lightly floured surface and knead until smooth and elastic, about 8 to 10 minutes. Shape the dough into a ball. 

If you've never kneaded dough for 10 minutes before, this is a great arm workout.
Spray some cooking spray into a large bowl, place the dough in the bowl and turn to coat it with oil. Cover with plastic wrap and let the dough rise in a warm place.

I set my oven to warm, placed the bowl in the oven and then turned the oven off. If you leave the oven light on, this should provide just enough of a warm environment for the yeast to do their thing of eating the sugar and releasing the carbon dioxide to make the bread rise. 

That's right: bread is nothing more than powdered wheat and fungus farts. True story. 

After about two hours, the dough will have doubled in size. When ready, punch down and divide dough in half.
Preheat oven to 375º. 

Line 2 cookie sheets with parchment paper.

To Make the filling:
Combine the brown sugar, ground cinnamon, chopped pecans, 1/2 cup flour and 1/2 cup raisins. Pour 1/2 cup melted butter over the cinnamon mixture and mix until its a crumbly bowl of awesome.
Roll the dough halves out into large rectangles (approximately 10x16 inches). Sprinkle the filling evenly over the dough and starting from the wide side, roll up each half. 

Bring the ends of each roll together and form 2 oval shaped rings. Pinch the dough to seal it up. Place each ring on the cookie sheets. 

With scissors, make cuts 1/3 of the way through the rings at about 1 inch intervals. 
Let rise in a warm spot until the rings double in size again, about 45 minutes.

Bake in the preheated oven for 30 minutes, rotating the cakes half-way through the baking process.

Transfer to a wire rack to cool (but leave the parchment paper intact for now.) 

When cool enough to touch, push the toy baby into the bottom of the cake. If you are worried about someone chocking on the toy, you can either warn them or just place the baby on top, but that doesn't seem as much fun. 
 Frost while warm with the confectioners' sugar blended with 1 to 2 tablespoons of water.

Then sprinkle with the colored sugar. Tradition says it should be purple, gold and green, but be creative if you want. 


Laissez les bons temps rouler!