Project Wonderful

Tuesday, November 12, 2013

Pumpkin Gourd Soup

This Spring I decided to make some use of the beat-up gazebo in the yard and used it as a trellis for growing beans and gourds. The beans didn't end up doing much, but the gourds really enjoyed being able to climb and get some sunshine. As a result, I ended up getting several nice sized bottle gourd out of the deal.

To which, I then asked myself, "OK, now that you have them, what are you going to do with all these gourds?"

I figured I'd let a bunch of them dry and use them as table decorations for the holidays - sanded and varnished, they really look nice on the table for Thanksgiving.

But I'd read that there are several dishes that you could make out of the fresh gourds, so I picked one of the largest ones I managed to grow (the one on the right) and decided to try making some soup out of it.

Right off the bat, I'm going to NOT recommend making this soup. It takes too long, requires too many steps and while the result make turn out really nice, its just too much effort to make this something edible.

Having said all that, here's what I did:


I cut off the stem with a bread knife. Might as well have used a saw.

Inside are the immature seeds and a lot of white flesh.  


This, apparently, is the "good part."

I scooped out the seeds and separated them to toast up.

I figured pumpkin is a gourd and pumpkin seeds are awesome toasted. 

Birdhouse gourd seeds, however, are not awesome. It was like eating little wood pellets flavored with salt.

I placed the gourd face down in a baking dish with water and tossed it in a 350 degree oven for about 60 minutes. The inside turned soft, but the outside skin never turned fork tender. 

I cut the gourd up into chunks, then used a paring knife to cut out the white parts like you would a cantaloupe. 

Now the fun part begins! I diced up an onion and started it softening in the bottom of a large pot with a couple tablespoons of olive oil.

Once the onions were the right consistency (translucent, with a little color) I added a sliced apple, three cloves of garlic, 4 peppercorns, a bay leaf, the gourd, two cups of pumpkin saved from last year, about 3 cups of chicken stock and water to fill it up the rest of the way.

I let this simmer covered for about 45 minutes. 

Once it was simmered enough, I removed the peppercorns and the bay leaf and transferred the mush into a blender in batches and blended it till it was silky smooth.

If you have a stick blender, even better. I don't have a stick blender, so I get more stuff to clean up afterwards. "Labor of love" and all that. 
It's very important to remove the center section of the blender top and use a paper towel placed loosely over the opening to allow steam to vent. Otherwise the steam will cause the everything to erupt violently out of the blender like a volcano of 2nd degree-burn-inducing soup. 

After blending everything, I transferred it back to the original pot and seasoned it with salt and other spices. The overall mixture was pretty bland and required a good amount of salt. I also added a couple pinches of cumin and coriander, but you can season it however you like. Chipotle powder would also be good.

Overall, I'd say the soup came out great, but to be honest, it was WAY too much work making the gourd edible. By itself, its horribly bland, giving a pale greenish hue to the mix.

The verdict: Gourds are great for growing as they dont require much of any effort except training them to climb the tresllis and watering them occasionally. They are great for decorations, but really not worth the effort for food.

Back to the drawing board. 

Friday, November 1, 2013

Blackberry Cobbler

Blackberries have been pretty cheap at my local market, so for Halloween, I decided to make up some delicious blackberry cobbler.

Cobbler was a product of the early British American colonies when settlers couldn't find the ingredients to make their traditional (and rather disgusting) suet puddings. Most cobblers are done with the fruit on the bottom and then topped with a layer of uncooked biscuit dough. This recipe is done in reverse, with the batter on the bottom and the fruit on top. When it cooks, the fruit sinks a little, the batter rises a little and everything combines to make a big ol' batch of awesome.

In an attempt to use less refined sugar, I use a combination of sugar and honey. Most recipes allow you to substitute honey for sugar in a 1-to-1 ratio. However, the sugar in this recipe is used to get the berries to macerate (get all blissfully mushy) and berries won't macerate in honey, so I couldn't eliminate the sugar altogether.  Once the berries were nice and juicy, I added the honey just before dropping the spoonfuls of berries into the batter. The result is a sticky mess that has a unique flavor but still retains that classic cobbler taste.

And MAN is it good!

INGREDIENTS:

2 1/2 cups fresh or frozen blackberries (thawed and drained)
1/2  cup sugar
1/2  cup honey
1 cup all-purpose flour
2 teaspoons baking powder
1/2 teaspoon salt
1 cup milk
1/2 cup butter, melted
Preheat the oven to 375 and get to work:


Add the half cup of sugar to the berries and allow them to get juicy for about 20 minutes.  
While the berries are macerating and the oven's heating up, combine the flower, baking powder, salt and milk together until it's smooth.

Then add the melted butter and mix this all together.  This batter is going to look very wet, and you may be tempted to add more flour, but don't. Trust me on this.

Pour the batter into an 8 inch square baking dish, the drop spoonfuls of berries on top. The honey/sugar mix is going to be very thick, so scoop up the stuff with a spoon and drizzle it over the bare spots in the batter. 
 Toss this bad boy into the oven for 45-55 minutes, or until the batter is golden brown on top.

When you pull it out of the oven, it's going to look like a dish of molten lava. 

Make no mistake: this is hotter.


Give it AT LEAST 30 minutes to cool down before attempting to dig in. 

Enjoy!


Tuesday, October 29, 2013

Bitchen' Bourbon Barbecue Sauce

With yesterday's orgy of smoked meat - thanks to the opening of Schmidt Family Barbecue - I'm on a serious BBQ bender right now. And after the discussion about the fact that Schmidt's doesn't offer BBQ sauce, I decided to quell the angry masses and make my own.

Although it's got several ingredients, this recipe really couldn't be easier to make, and uses bourbon to help imbue the final sauce with an amazing flavor. If you think the best you can do for BBQ sauce is Sweet Baby Ray's, look out: this one will change your mind.

The recipe uses ketchup as a base, but you could easily omit the ketchup and roast up some fresh tomatoes into a sauce that will dramatically improve the flavor.

It's also relatively mild when it comes to the pepper. I'm not a big fan of peppery BBQ sauce, so feel free to tart it up with your favorite heat. A 1/3 tsp should be more than enough, but your mileage may vary.

INGREDIENTS:

1/2 onion, minced
4 cloves garlic, minced
3/4 cup of bourbon whiskey (always use good bourbon. Life is too short for cheap booze)
1/2 tsp black pepper
1/2 tbs salt
2 cups ketchup
1/4 cup tomato paste
1/3 cup apple cider vinegar
2 tbs liquid smoke
1/2 cup of brown sugar, packed
1/4 cup Worcestershire sauce
1 tsp ground mustard
1/2 tsp dried basil


In a large saucepan, combine the onions, garlic and bourbon.

Simmer till the onions have absorbed the whiskey and turned translucent, about 10 minutes. 

In a mixing bowl combine everything else. 

It helps to mix this up first, before adding it to the pan.

Bring the heat to a boil, then reduce to a simmer and let it bubble slightly for about 20 minutes. 
After simmering, toss everything in a blender for about 30 seconds to get a smooth texture.

Be sure to remove the center section of the blender top and place a towel lightly over the opening. Otherwise you will decorate the ceiling and walls of your kitchen with scalding barbecue sauce. 

Pour that pitcher full of awesome into a bowl and let it cool. 
The sauce should be fairly thick. If you want it a little thinner, add a little more apple cider vinegar.


After it cools (I placed the bowl on top of an ice pack), use a funnel and pour the sauce into a mason jar. You should have just slightly more than enough for a full jar. 

Label and date the jar, toss it in the fridge and you're good to go. Because its made fresh, without chemicals and preservatives, it probably won't keep more than a month in the fridge. Around my house, this sauce wont keep for more than a week, but that has nothing to do with it going bad.


Enjoy!

Monday, October 28, 2013

Restaurant Review: Schmidt Family Barbecue

It doesn't take much to appreciate Texas barbecue: Just dig in and enjoy the magical harmony of smoke and meat as it blissfully dances across your palate. But to be considered a true Texas BBQ aficionado, one needs to know a little about the tiny town of Lockhart and the BBQ feud (barbefeud?) that took place there.

Back in 1900, Charles Kreuz, Sr. (pronounced "krites") opened a small meat market and grocery store in Lockhart. Refrigeration wasn't as advanced as we have it today, so to prevent the unsold meat from spoiling, Charles would cook the the best cuts over a BBQ pit and use the lesser cuts for sausage. Customers loved the BBQ and the Kreuz family ran the market until 1948, when long-time employee Edgar Schmidt bought the business.

When Edgar passed away in 1990, he left the building to his Daughter Nina. However, while Nina owned the building, Edgar's sons Rick and Don owned the business, and the family couldn't see eye-to-eye on things. As a result, the brothers moved Kreuz Market to a new location down the street, while Nina opened Smitty's BBQ in the old building. The feud - along with a couple of other fantastic BBQ joints that opened in the area - helped to put Lockhart on the map as the official Barbecue Capital of Texas.

The third generation of Schmidts have now taken over the business. This year, Rick's son Keith, along with his brother John, sister Susie Schmidt-Franks (Don's daughter) and Susie's husband Chad Franks realized that the world craved even more of the smokey mana of the Gods, so they joined forces and opened Schmidt Family Barbecue in Bee Cave.

Managed by Nina's son, and former Smitty's pitmaster John Fullilove (and how can you not love food made by a guy who's name is "Full of love"?), the new restaurant draws on the century-old family heritage to bring the classic Texas-style BBQ to the Hill Country.

The coals used to light the 16-foot-long, 4 1/2 ton fire pit were collected from the pits from both Smitty's and Kreuz Market - which have been burning steadily for 113 years - and carefully transported to Lakeway in a ceremony I can only imagine looked like a Texas version of the Olympic torch relay.

We got there at 12:30 with about 50 people already ahead of us, but the line was moving quickly and no one seemed to mind.

Opening day is always a tough time to critique a new restaurant. Usually there is a long break-in period where the staff works out the kinks in the operation, but one foot inside the door and you could see that this was already a well-oiled machine. The crews were quickly slicing up the brisket, chopping up the ribs and serving it up with little delay. They knew they were going to be swamped with customers and staffed accordingly.


Fair warning: A thing you need to know when coming to Schmidt's: there's no sauce. None. That may be a bit shocking to some folks, and there were several customers wondering where the sauce was, but the Schmidt family holds fast to the belief that good barbecue doesn't need to hide behind sauce. And you know what? They're right. Good 'cue should be measured on the quality of the meat alone; naked and un-accosted, for all the world to see. 

They also begrudgingly offer forks for the more civilized folks, but to be honest, the best utensils to eat BBQ with are right at the end of your arms. 


In a word, the meat was extraordinary. 
The brisket had a solid, well defined smoke ring, good bark, and was perfectly cooked. Tender, flavorful, and delicious.

The sausage ring was surprisingly lightly seasoned. Most Texas hot rings are filled with an abundance of pepper, but this one had a nice balance of spices and was stuffed in a casing that gave a decent snap, but wasn't so tough that you needed to work at it to get through it. It was also SUPER juicy, so make sure to lean forward when taking that first bite.

About the only thing that I was a bit surprised about were the pork ribs. They were nicely cooked, juicy and tender, and had a flavorful rub on them, but they left the silver skin on. To me, this is a BBQ faux pas. That piece of membrane makes it difficult to sink your teeth properly into the rib and it's just tough and inedible. Removing the membrane is a chore, and perhaps they skipped this step in their efforts to make sure that the ribs would be ready for opening day. The ribs are VERY GOOD, but removing it would be the thing that I feel helps make them one step better.

The food was served on butcher paper the way it's been done for over a century, and comes with the obligatory slices of white bread, onions, and pickles. The pickles were cut a little thicker than most BBQ places and that was a nice touch. I quickly slapped together an open-face brisket sandwich - and this is the point that I wished I had some BBQ sauce to go with it. I'm thinking of sneaking some homemade sauce with me in a little bottle next time I visit.

We also tried the potato salad, coleslaw, and beans. The potato salad and slaw were very good, but really nothing to write home about. The beans, however, really surprised me. I don't know how they did it, but the flavors were absolutely incredible. Hearty and delicious, they went great with the rest of the BBQ.

There's also the usual assortment of banana pudding and pies, but apparently no cobbler. Not that I had room for any desert after powering through all that wonderful smokey awesomeness, of course.

With a long lineage of expert preparation, the old-school tradition of smoking quality meat and serving it without pretense continues with the new restaurant. From its strong family roots in the BBQ Capital of Texas, the new Schmidt Family Barbecue in Bee Cave is sure to please even the most discerning of BBQ aficionados.

Long may its smoke fill the air!


Friday, October 25, 2013

Pan-Seared Pork Chops With Sauteed Collard Greens

Here's a great recipe for a fall evening. Classic pork chops served with sauteed collard greens.

To add some additional flavor and to help prevent things from sticking, we use small cubes of pork fat, called "Lardons." There's nothing fancy about this. I trim the fat off of a ham (leaving some of the meat attached), place the cubes in a bag and toss them in the freezer for future use. 

This recipe also uses some rendered bacon fat, which is the perfect thing to do with those drippings after cooking bacon. Naturally, this is not the healthiest of ingredients, but thankfully you aren't using a whole lot. For a pound of collard greens, you are using maybe 1 tablespoon of bacon fat and perhaps 1/8 of a cup of lardons. If you wanted to make this even healthier, you could substitute all of that with two tablespoons of olive oil, but you wouldn't get that great bacon flavor in the final mix, so your mileage may vary. 

The chops are seasoned with "essence," which is a recipe that I stole from Emeril Lagasse. The ingredients are listed below. I made a batch of this stuff a while ago and am still using it. If you don't have the time to make the essense, use your favorite seasoning you have on hand. (Mom used to always just use seasoned salt, which works just fine.) I also added a little dried rosemary just because I love cooking with rosemary.

Ingredients:
2 pork tenderloin chops, bone on
1/8th cup of lardons
1 tbs bacon fat
1 bunch (about 1 lb) Collard Greens
1 green apple, sliced into thin chunks
1/2 onion, sliced or diced
1 clove of garlic, minced
1/2 cup of apple cider vinegar
2 tsp of "essence"

Essence recipe:
2 1/2 tablespoons paprika
2 tablespoons salt
2 tablespoons garlic powder
1 tablespoon black pepper
1 tablespoon onion powder
1 tablespoon cayenne pepper
1 tablespoon dried oregano
1 tablespoon dried thyme


First the prep work:

Wash the collards and trim the stems off (save them for the sautee). 
Then stack the greens together, roll them into a cigar shape and slice them into 1/4' strips. This is known as a Chiffonade
This allows the greens to cook evenly and in much less time than just chopping them randomly. 

Dice up the collard green stems, slice the apple into thin chunks, dice up 1/2 an onion and mince up 1 clove of garlic and have this ready to go. 

Now we're ready to get the fire going. 

Add the lardons and the bacon fat to a medium sized pan under low heat until they render out to a liquid.

Once that's done, turn the pan up to medium-high heat, lay the chops in and season with the essence or your favorite seasoning. 

You want to get a nice sear on both sides. These chops were fairly thin, so a minute or two is all you're going to need.

Once they're cooked, set the chops aside to rest.

Add the chopped apples, onions and collard green stems and saute them until they just start to cook. 


Once the mixture has cooked a little, add the vinegar to help deglaze the pan.

Deglazing helps to lift the browned bits that were cooked onto the pan while cooking the pork chops. Think of these as flavor pockets! Normally deglazing is done with wine, but in this recipe, apple cider vinegar does the trick. 

Add the minced garlic at this point.

Once things have started to simmer again, add the collards.

By this time, the house should begin to fill with the sensational smell of apple cider vinegar and garlic. Pure bliss, as far as I'm concerned.

Cook the collards till they have reduced somewhat, aprox 5 minutes, then add the chops back on top of the greens and cover, cooking for another 2-3 minutes. You're just warming the meat back up at this point and the cover keeps everything moist and delicious.

Then you're ready to serve. 


Enjoy!


Wednesday, October 23, 2013

Toasted Pumpkin Seeds

As part of my on-going series of stuff to do with pumpkin, I would be remiss if I didn't mention pumpkin seeds.

I love these things. They are one of the great seasonal snacks of Fall. And they're good for you, too:
A 1/4 cup of seeds contains almost half the recommended daily amount of magnesium and they are a great source of zinc, plant-based omega 3 acids, anti-oxidants, fiber, and may also help improve insulin regulation in the body and increase the good HDL cholesterol we need. 

OK, they're healthy when they are raw, or toasted without anything else added to them. This recipe uses brown sugar and a little salt, but it's not a huge amount, so they're still pretty healthy. It's better than eating a ton of tortilla chips from that roasted tomatillo salsa recipe I posted a while back. 

And around Halloween, they are the perfect thing to snack on once all the jack-o-lantern carving is done. 

I've been craving these things since the beginning of October, but because I still have about 7 cups of pumpkin puree taking up space in the freezer, I havent had the space available to get this year's pumpkin and go to town munching on the seeds. 

But my girlfriend showed pity on my addiction and brought home two cups of organic hulled pumpkin seeds from the store for me to play with. God I love that woman. 

Normally I use the seeds without bothering to shell them. It's too much work and too little payoff and when you toast them right, they get nice and crunchy and easy to chew. But since these were already shelled, I decided to give these a go. This recipe should work with either shelled or un-shelled seeds.

These are a great snack, but just be careful that you don't eat them all in one sitting. 

INGREDIENTS:

2 cups of pumpkin seeds 
1 tbs olive oil
2 tbs brown sugar
2 tsp pumpkin pie spice
1/2 tsp salt

First, preheat the oven to 300 and line a baking sheet with parchment paper or aluminum foil


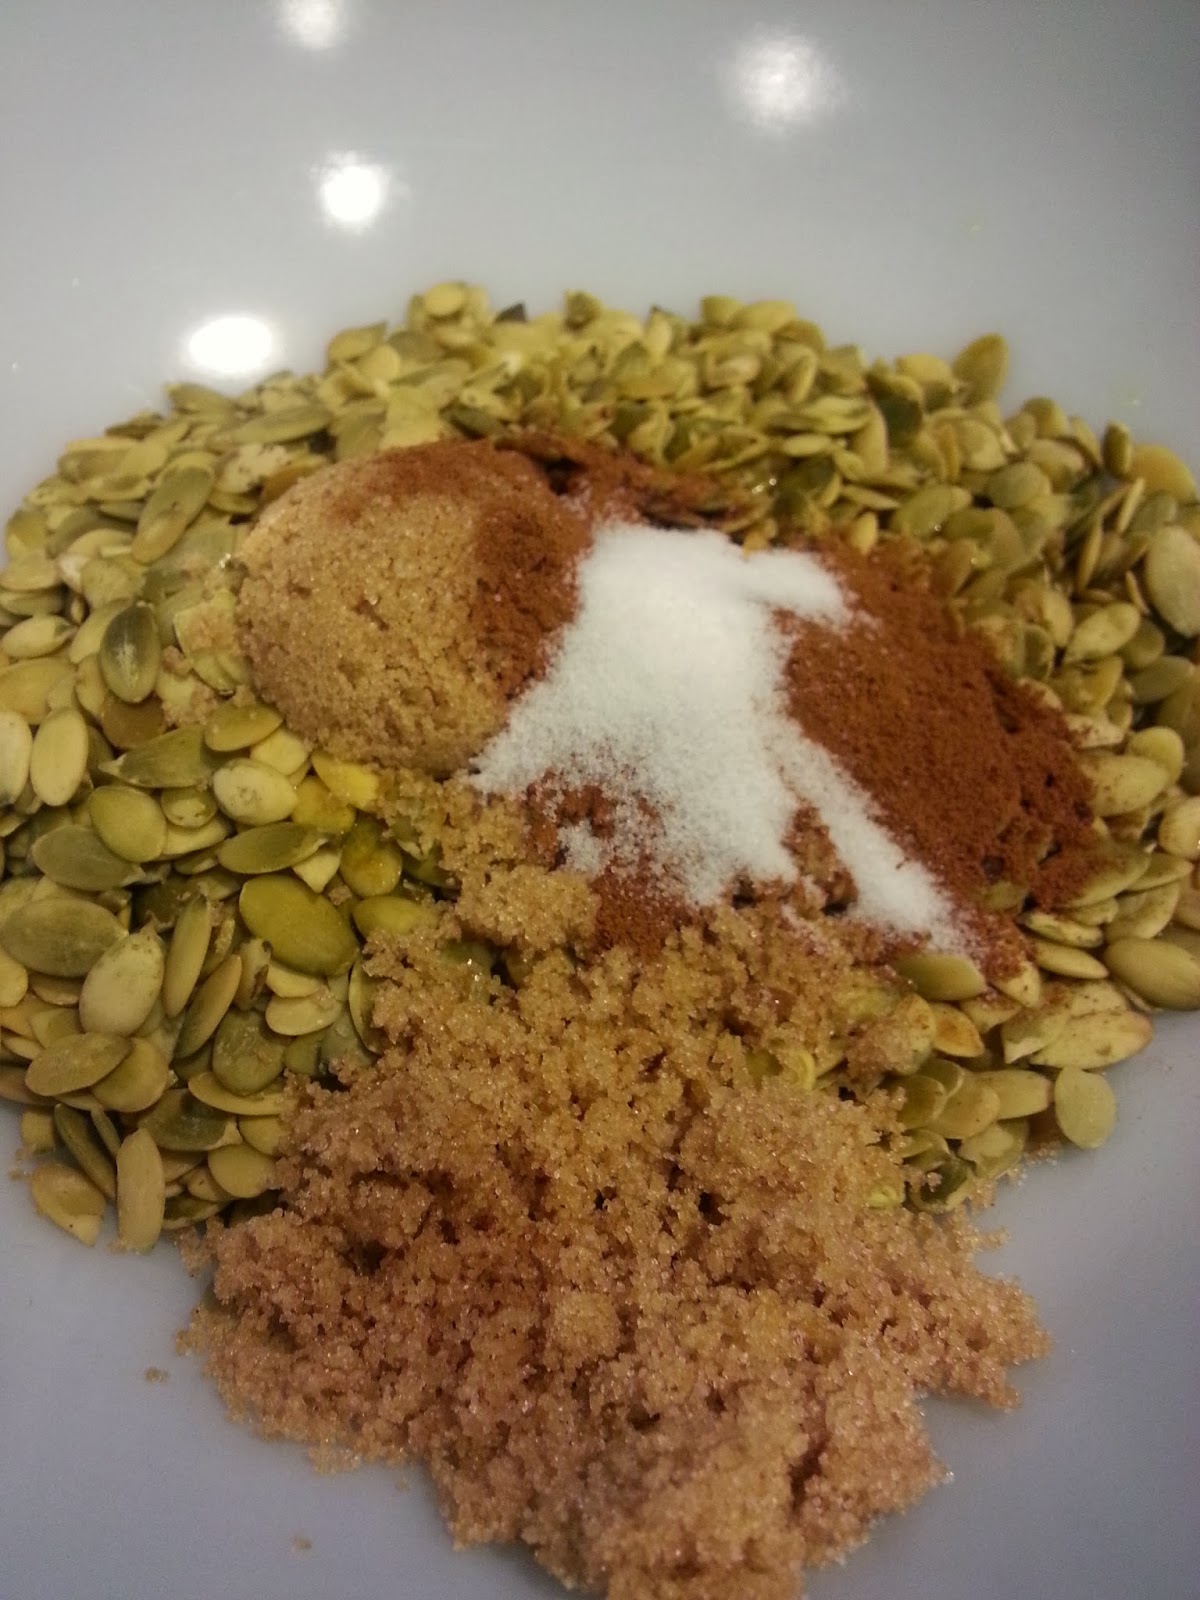
This is two cups of shelled organic seeds. 


Add all the ingredients into a bowl.

Mix them together thoroughly. That's kind of a psychedelic looking image, but that's what I get for trying to get an action shot. of the mixing process.

This is what it should look like mixed. 

Spread them onto the baking sheet in a single layer, or as close to a single layer as you can. 


Bake in the over at 300 degrees for 10 minutes, stir the seeds lovingly, allowing the aroma of pumpkin pie spice to fill the house, and bake for another 10 minutes.

Let them cool a little before tossing them into a bowl and serving. 

Enjoy!


Thursday, October 10, 2013

"Healthy" Pumpkin Cupcakes

As part of my continuing series on using pumpkin in the Fall (and because I still have several pounds of puree to get out of my freezer),  I grabbed a recipe from Dani Stout over at her blog Ancestral Nutrition and gave a go at her "pumpkin cupcakes with maple cream cheese frosting." The recipe is actually pretty simple and it uses almond flour and honey  - so it's technically healthy - or at least healthier than using flour and sugar.

I learned a couple of valuable lessons with this recipe:

The first, is that my friend's new Ninja Blender is sharp. REALLY sharp. Like, gushing-blood-from-the-laceration-inflicted-by-catching-the-blender-blade-as-it-falls-out-of-the-food-processor-attachment-thus-saving-severe-injury-to-your-girlfriend's-foot kinda sharp. Holy Hell! I didn't even feel the blade sink into my hand. A thorough washing of the equipment (and my hand) and a large bandage and I was back in business.

The second is that if you intend to use cream cheese for a frosting, dont freeze it. Freezing creates crystals inside the cheese that then gives you a completely different texture to the frosting. No matter how much whisking you do, its going to come out watery and curdled.

Here's the recipe:

For the muffin:
1 cup pumpkin puree
2 cups almond flour
1/2 cup honey 
2 eggs 
1/2 cup milk 
2 tbsp cinnamon 
1 tsp baking soda 

For the frosting:
1 1/2 cups cream cheese
1/2 cup butter (one stick) 
1/2 cup maple syrup (always use the good stuff. Its not cheap, but its pure)

First, preheat the oven to 375...

I had almond meal, which is much coarser than flour, but blending it for a few minutes makes it a much finer texture. 

Add all the other ingredients to the flour and blend until its a smooth batter.
Pour the batter into lined muffin tins and place them in the oven for about 25 minutes - or until a toothpick inserted into the center of the muffin comes out clean.
For the frosting, whip the cream cheese, butter and maple syrup together, toss it in a zip-lock bag, cut a tiny corner off of the bag and pipe the cream onto the cooled muffins. 

The finished product. It stuck quite a bit to the paper lining. A bit more than I like, but at least it left me with a muffin tin that I didn't need to spend a lot of time cleaning. 

The texture was perfect and the taste was amazing.

For an added touch, Dani mentioned that you can dust the top of the icing with coconut sugar to make it more fancy, but I promise you that they will not be sitting long enough to dust them with sugar. 


Enjoy!