Project Wonderful

Showing posts with label pumpkin. Show all posts

Friday, January 3, 2014

Toasted Pumpkin Seeds Version 2

If you're like me, one of the best parts about the holiday season is the prevalence of pumpkin. I love pumpkin pie, pumpkin bread, pumpkin soup, pumpkin muffins and just plain old carving up a pumpkin for Halloween. And one of the best parts about having these cheap gourds around is the toasting of the seeds into a crack-like snack for munching on.

This is the original recipe I've been using for a couple of years, courtesy of AllRecipes.com

No photos this time, because I was caught up in the roasting and pureeing of the pumpkin for my other blog post.

But here's all the things you need to know:


Ingredients:

1 cup raw pumpkin seeds - rinsed and dried
6 Tbsp white sugar, divided
1/4 tsp salt
1/2 tsp pumpkin pie spice
1 Tbsp vegetable oil.


  • Preheat the oven to 250º
  • Spread the pumpkin seeds in a single layer on a baking sheet.
  • Toast for 45 minutes, stirring occasionally, until dry and toasted. Larger seeds may take longer.
  • In a large bowl, stir together 2 tablespoons of white sugar, salt and pumpkin pie spice. Set aside.
  • Heat the oil in a large skillet over medium-high heat.
  • Add the pumpkin seeds and sprinkle the remaining sugar over them.
  • Stir with a wooden spoon until the sugar melts, about 45 seconds.
  • Pour the seeds into the bowl with the spiced sugar and stir until coated.
  • Allow to cool before serving.
  • Store in an airtight container at room temp.


Enjoy!


Pumpkin Puree

Now that the holidays are over, it's time to do some prep for the remainder of the winter. For me, that means making pumpkin puree for the variety of pumpkin dishes I like to make.

We've had these pumpkins sitting on our dining room table since October. These also aren't pie pumpkins, just plain old jack-o-lantern style that we got at HEB before Halloween. They're pretty starchy at this point, but they'll still work fine for cooking.

Start carving into them in a manner befitting their Halloween-ish upbringing. 

Scoop out the guts, rinsing and drying the seeds for later toasting. 

Cut up the pumpkin into chunks that will lay relatively flat.
Place them face down on a couple of baking sheets.
You'll probably want to hit the pans with some cooking spray, but it's not really a big problem.


Into the oven they go.  350º - 400º for about an hour.
You want to be able to stick a fork easily through the skin.

The house smells really nice during this process. 

After roasting the chunks, let them cool and you should be able to peel most of the skin right off.
Not all of it will come off this easy, though, so you will probably have to break out the parring knife and cut the flesh away from the skin as closely as possible. 

Then just drop the chunks into a food processor to turn them into mush.

Voila: pumpkin mush.


Two medium-sized pumpkins netted us 23 cups of puree.
Labeled and now stored in the freezer, they are ready for the soups and breads and muffins to come.

Wednesday, November 20, 2013

Scarborough Pumpkin Soup


I'm calling this "Scarborough Pumpkin Soup" because it uses parsley, sage, rosemary and thyme. Get it?

Damn, I'm creative.

This of course, got me thinking about the song and the significance of the ingredients.

The tune, made popular by Simon and Garfunkel in 1965,  is officially called "Scarborough Fair," and is a traditional English ballad that originated in the 1600's, though the ingredients mentioned first appeared some time around the 1800's. Apparently it's a tale of a young man instructing the listener to instruct his former love to perform a series of impossible tasks - like making a shirt without a seam and then washing it in a dry well. If she completes these tasks, he will take her back.

So basically it's "ye olde English" way of saying "I'll take you back when monkeys fly out of my butt."

According to wikianswers.com, the four ingredients symbolize four virtues that the subject of the song is requesting of his former love:
Parsley (Petroselinum crispum)
Allegedly aids in digestion and removes the bitterness from food.
Sage (Salvia officinalis) 
Symbolizes strength.
Rosemary (Rosmarinus officinalis)
Represents faithfulness, sensibility, love and remembrance.  
Thyme (Thymus vulgaris)
Symbolizing courage.
Regardless of the reasons, the four herbs work well together in soup, which is why I decided to use them in the first place.

Plus, I still had some leftover pumpkin puree that I needed to get rid of to make room for more pumpkin puree this year.

I made the soup using some duck stock that I spent the morning making (I threw some duck parts in a pot of water and let it simmer for 4 hours.) You dont really need to use duck stock. Chicken stock works just as well. I just had it available and decided to use it. I do have to say that it gave an incredible flavor to the soup.

Also this recipe uses the three ingredients, onions, carrots and celery as a base. In French cooking, this is known as a mirepoix (pronounced "meer-pwah") and is the starting point for a lot of French soups, stews and sauces.

So now that you know the secret meanings behind the herbs and the fancy name for chopped veggies in a soup, here's how to make this awesome creation:

INGREDIENTS

  • 1/2 onion, diced
  • 3 carrots, shaved/ peeled
  • 2 stalks of celery, chopped
  • 1 apple, cored/ slice
  • 3 cloves garlic, chopped
  • 2 cups cooked pumpkin puree
  • 3 cups duck broth (chicken broth works good too)
  • 1 tbs dried parsley
  • 1 tbs dried sage
  • 1 tbs dried rosemary
  • 1 tbs dried thyme
  • salt and pepper to taste

In a large stock pot add the carrots celery and onions. 
Let them cook down just a little and release some of their flavor.


Add the apples and stir.


Add the garlic and stir. Dont let it brown. 
   
In goes the pumpkin, followed immediately by the broth.
 
In go the herbs.
I like to place them in my hands and crush them a little more as they go into the soup.

A quarter-sized amount of dried herbs in my palm equals about a tablespoon. 
 
Cover, and let the whole thing simmer for about 35 minutes.

After simmering, blend using a stick blender or a regular blender with the center clear section of the lid removed and a paper towel in its place. 
This allows the steam to escape without exploding the soup everywhere. 


Once blended, return the soup to the pot and serve it with a pinch of fresh parsley on the top.


Enjoy!


Tuesday, November 12, 2013

Pumpkin Gourd Soup

This Spring I decided to make some use of the beat-up gazebo in the yard and used it as a trellis for growing beans and gourds. The beans didn't end up doing much, but the gourds really enjoyed being able to climb and get some sunshine. As a result, I ended up getting several nice sized bottle gourd out of the deal.

To which, I then asked myself, "OK, now that you have them, what are you going to do with all these gourds?"

I figured I'd let a bunch of them dry and use them as table decorations for the holidays - sanded and varnished, they really look nice on the table for Thanksgiving.

But I'd read that there are several dishes that you could make out of the fresh gourds, so I picked one of the largest ones I managed to grow (the one on the right) and decided to try making some soup out of it.

Right off the bat, I'm going to NOT recommend making this soup. It takes too long, requires too many steps and while the result make turn out really nice, its just too much effort to make this something edible.

Having said all that, here's what I did:


I cut off the stem with a bread knife. Might as well have used a saw.

Inside are the immature seeds and a lot of white flesh.  


This, apparently, is the "good part."

I scooped out the seeds and separated them to toast up.

I figured pumpkin is a gourd and pumpkin seeds are awesome toasted. 

Birdhouse gourd seeds, however, are not awesome. It was like eating little wood pellets flavored with salt.

I placed the gourd face down in a baking dish with water and tossed it in a 350 degree oven for about 60 minutes. The inside turned soft, but the outside skin never turned fork tender. 

I cut the gourd up into chunks, then used a paring knife to cut out the white parts like you would a cantaloupe. 

Now the fun part begins! I diced up an onion and started it softening in the bottom of a large pot with a couple tablespoons of olive oil.

Once the onions were the right consistency (translucent, with a little color) I added a sliced apple, three cloves of garlic, 4 peppercorns, a bay leaf, the gourd, two cups of pumpkin saved from last year, about 3 cups of chicken stock and water to fill it up the rest of the way.

I let this simmer covered for about 45 minutes. 

Once it was simmered enough, I removed the peppercorns and the bay leaf and transferred the mush into a blender in batches and blended it till it was silky smooth.

If you have a stick blender, even better. I don't have a stick blender, so I get more stuff to clean up afterwards. "Labor of love" and all that. 
It's very important to remove the center section of the blender top and use a paper towel placed loosely over the opening to allow steam to vent. Otherwise the steam will cause the everything to erupt violently out of the blender like a volcano of 2nd degree-burn-inducing soup. 

After blending everything, I transferred it back to the original pot and seasoned it with salt and other spices. The overall mixture was pretty bland and required a good amount of salt. I also added a couple pinches of cumin and coriander, but you can season it however you like. Chipotle powder would also be good.

Overall, I'd say the soup came out great, but to be honest, it was WAY too much work making the gourd edible. By itself, its horribly bland, giving a pale greenish hue to the mix.

The verdict: Gourds are great for growing as they dont require much of any effort except training them to climb the tresllis and watering them occasionally. They are great for decorations, but really not worth the effort for food.

Back to the drawing board. 

Wednesday, October 23, 2013

Toasted Pumpkin Seeds

As part of my on-going series of stuff to do with pumpkin, I would be remiss if I didn't mention pumpkin seeds.

I love these things. They are one of the great seasonal snacks of Fall. And they're good for you, too:
A 1/4 cup of seeds contains almost half the recommended daily amount of magnesium and they are a great source of zinc, plant-based omega 3 acids, anti-oxidants, fiber, and may also help improve insulin regulation in the body and increase the good HDL cholesterol we need. 

OK, they're healthy when they are raw, or toasted without anything else added to them. This recipe uses brown sugar and a little salt, but it's not a huge amount, so they're still pretty healthy. It's better than eating a ton of tortilla chips from that roasted tomatillo salsa recipe I posted a while back. 

And around Halloween, they are the perfect thing to snack on once all the jack-o-lantern carving is done. 

I've been craving these things since the beginning of October, but because I still have about 7 cups of pumpkin puree taking up space in the freezer, I havent had the space available to get this year's pumpkin and go to town munching on the seeds. 

But my girlfriend showed pity on my addiction and brought home two cups of organic hulled pumpkin seeds from the store for me to play with. God I love that woman. 

Normally I use the seeds without bothering to shell them. It's too much work and too little payoff and when you toast them right, they get nice and crunchy and easy to chew. But since these were already shelled, I decided to give these a go. This recipe should work with either shelled or un-shelled seeds.

These are a great snack, but just be careful that you don't eat them all in one sitting. 

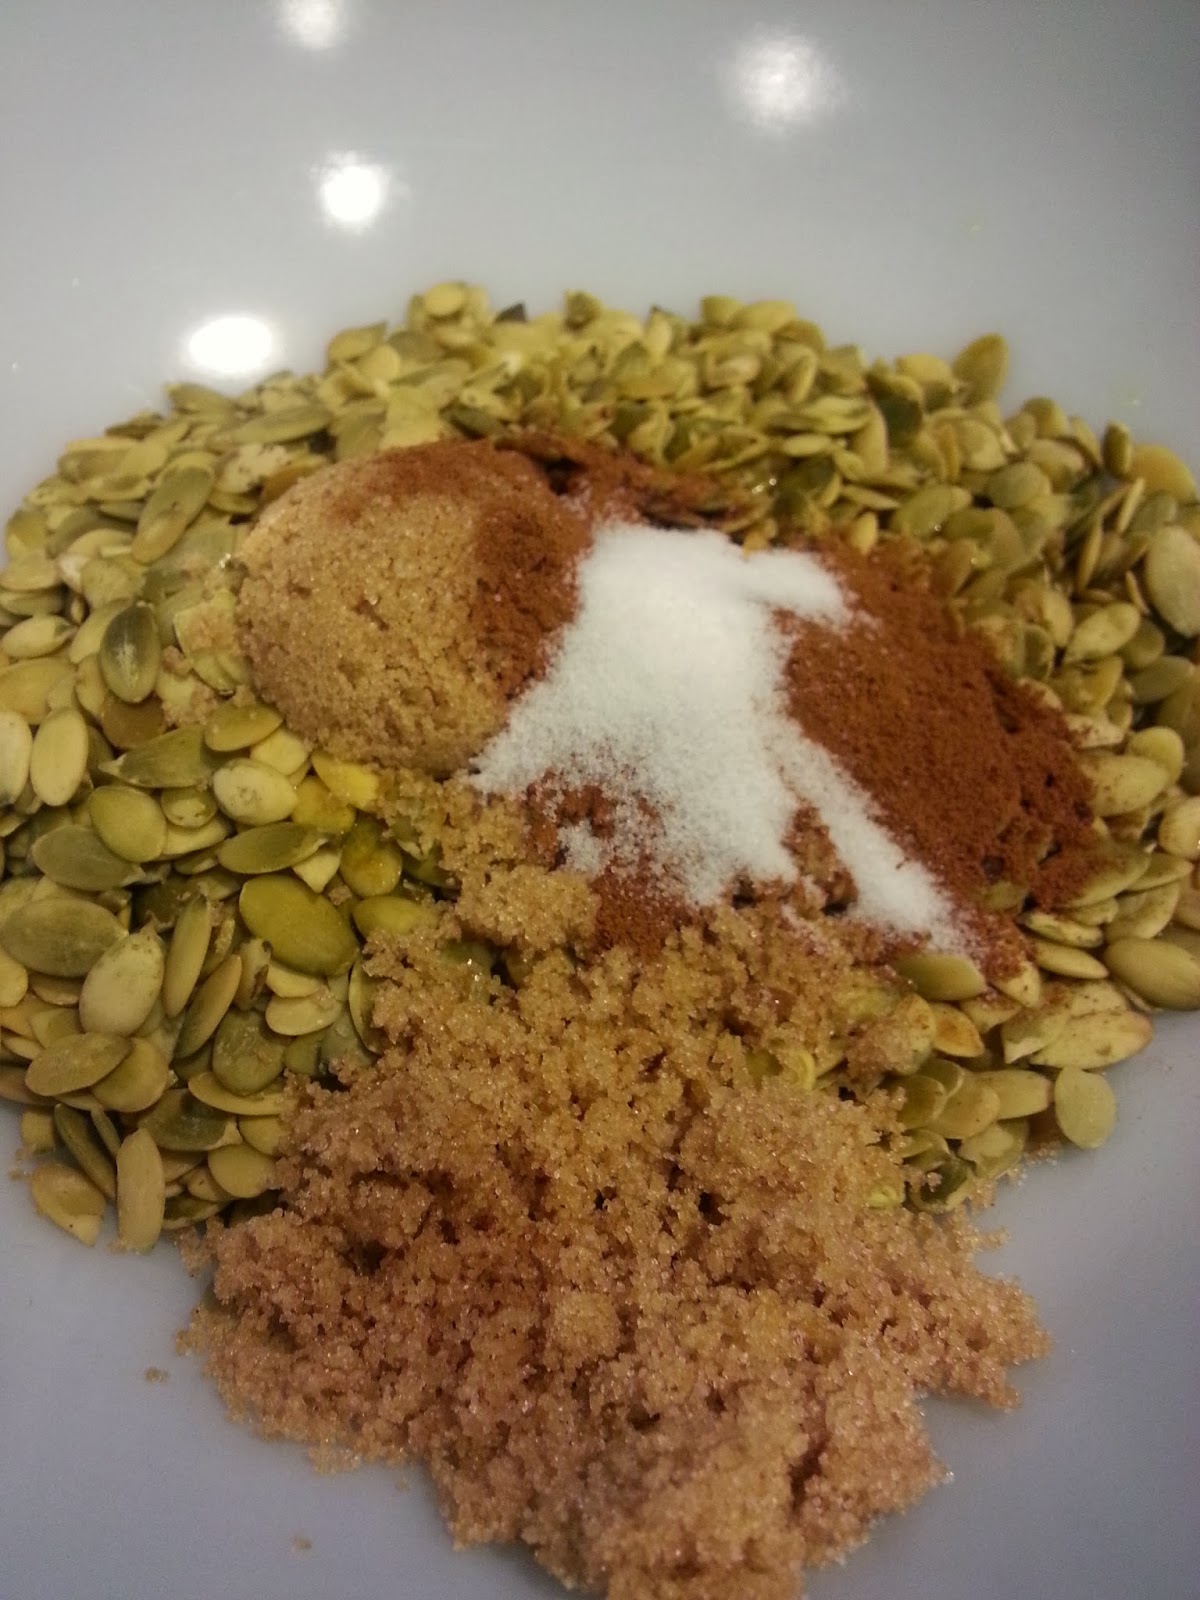
INGREDIENTS:

2 cups of pumpkin seeds 
1 tbs olive oil
2 tbs brown sugar
2 tsp pumpkin pie spice
1/2 tsp salt

First, preheat the oven to 300 and line a baking sheet with parchment paper or aluminum foil


This is two cups of shelled organic seeds. 


Add all the ingredients into a bowl.

Mix them together thoroughly. That's kind of a psychedelic looking image, but that's what I get for trying to get an action shot. of the mixing process.

This is what it should look like mixed. 

Spread them onto the baking sheet in a single layer, or as close to a single layer as you can. 


Bake in the over at 300 degrees for 10 minutes, stir the seeds lovingly, allowing the aroma of pumpkin pie spice to fill the house, and bake for another 10 minutes.

Let them cool a little before tossing them into a bowl and serving. 

Enjoy!


Thursday, October 10, 2013

"Healthy" Pumpkin Cupcakes

As part of my continuing series on using pumpkin in the Fall (and because I still have several pounds of puree to get out of my freezer),  I grabbed a recipe from Dani Stout over at her blog Ancestral Nutrition and gave a go at her "pumpkin cupcakes with maple cream cheese frosting." The recipe is actually pretty simple and it uses almond flour and honey  - so it's technically healthy - or at least healthier than using flour and sugar.

I learned a couple of valuable lessons with this recipe:

The first, is that my friend's new Ninja Blender is sharp. REALLY sharp. Like, gushing-blood-from-the-laceration-inflicted-by-catching-the-blender-blade-as-it-falls-out-of-the-food-processor-attachment-thus-saving-severe-injury-to-your-girlfriend's-foot kinda sharp. Holy Hell! I didn't even feel the blade sink into my hand. A thorough washing of the equipment (and my hand) and a large bandage and I was back in business.

The second is that if you intend to use cream cheese for a frosting, dont freeze it. Freezing creates crystals inside the cheese that then gives you a completely different texture to the frosting. No matter how much whisking you do, its going to come out watery and curdled.

Here's the recipe:

For the muffin:
1 cup pumpkin puree
2 cups almond flour
1/2 cup honey 
2 eggs 
1/2 cup milk 
2 tbsp cinnamon 
1 tsp baking soda 

For the frosting:
1 1/2 cups cream cheese
1/2 cup butter (one stick) 
1/2 cup maple syrup (always use the good stuff. Its not cheap, but its pure)

First, preheat the oven to 375...

I had almond meal, which is much coarser than flour, but blending it for a few minutes makes it a much finer texture. 

Add all the other ingredients to the flour and blend until its a smooth batter.
Pour the batter into lined muffin tins and place them in the oven for about 25 minutes - or until a toothpick inserted into the center of the muffin comes out clean.
For the frosting, whip the cream cheese, butter and maple syrup together, toss it in a zip-lock bag, cut a tiny corner off of the bag and pipe the cream onto the cooled muffins. 

The finished product. It stuck quite a bit to the paper lining. A bit more than I like, but at least it left me with a muffin tin that I didn't need to spend a lot of time cleaning. 

The texture was perfect and the taste was amazing.

For an added touch, Dani mentioned that you can dust the top of the icing with coconut sugar to make it more fancy, but I promise you that they will not be sitting long enough to dust them with sugar. 


Enjoy!

Wednesday, October 2, 2013

Chocolate Chip Pumpkin Bread

There are hundreds of recipes for pumpkin bread out there. Here's one of them.

The recipe was originally stolen from Betty Crocker, but I've made a few changes to it. Specifically, there are no walnuts. I hate those damn things. Nasty little pockets of savory flavor in an otherwise wonderfully sweet and decadent cake-like texture. Horrible little things. Satans boogers. 

So if you are a fan of walnuts, you can add them if you want, but expect a lot of scorn and ridicule from me if you do.

Also, Betty Crocker says this recipe makes two loves. I'm not sure what ol' Betty is smoking, because I had enough to make three loaves with this batch.

Ingredients:

4cups  all-purpose flour
2tsp  baking soda
1tsp  salt
1tsp ground cinnamon
1/2tsp ground nutmeg
2cups sugar
3/4cup butter, softened
4eggs
1/2cup water
2 cups of pumpkin puree (you can use the canned crap if you want, but why?)
1cup plus 2 tablespoons miniature semisweet chocolate chips
2tsp sugar


First, preheat the oven to 350 (and remember to remove the cast iron pan you keep in it before doing anything else.)

Grease the bottom (just the bottom) of three regular sized loaf pans. I rub the end of a stick of butter onto the bottom of the pan. This seems to work pretty well.


In a large bowl, add the flour, baking soda, salt, cinnamon, and nutmeg and mix until they are all combined. Set this aside.


Take the two cups of sugar and the softened butter and whip them till its creamed together.

Then add the four eggs, one at a time into the mix. Mix each egg in completely before adding the next egg. 

Add the pumpkin and the water, then slowly add the flour mix and mix on low until everything is combined.

Add about a cup of mini chocolate chips. Save a couple tablespoons of the chips.

Mix until everything is together. 

Pour the batter into each loaf pan. Add a little bit at a time until all the pans are even.
You will want to leave room for the batter to expand, so dont fill them to the top.

About this time, hand your bowl, mixer blades and spatula to your loving significant other.
Because you are awesome that way. 

Spread out the batter so its even and smooth. Clean up the edges whichever way is the best tasting.


Take the remaining two tablespoons of mini chocolate chips and sprinkle them over the top.
Then sprinkle the sugar over everything.

Into the 350 degree oven for about 1 hour and 5 minutes. It may need to go to 1:15. Just keep an eye on it.

Poke a toothpick through the bread. If it comes out clean, they're done.


Now the hard part: Let these cool for about an hour before cutting into them.

The end result. It was a very light and cake-like. Not at all like a typical pumpkin bread.

The chocolate chips add a nice touch. 


Enjoy!